


We’re BIG proponents around here of rehabbing, reusing and breathing new life into old pieces, but have never really delved into HOW to do it properly. Sure, you’ve probably Googled “how to paint/refinish furniture” only to come out of the search more confused than ever—or maybe every refinishing project you’ve attempted has come out looking a little…weathered (raising my own hand here). If so, this post is for you.
To help simplify the process, we tapped our friend Meg Piercy of MegMade, a furniture makeover and design business based in Chicago that we’ve been fans of for years, for her expert guidance. We figured someone who has made a successful brand out of refinishing and re-painting furniture would know what’s up, right? Read on for her expert tips and to see her in action as she tackles a piece from start to finish.
Take it away, Meg.
Hi, Meg Piercy here, founder and owner of MegMade. MegMade started about six years ago when we decided to paint our first son’s changing table after not being able to find an affordable version of what we wanted. We ended up loving the whole process, so we started painting and refinishing pieces for fun and selling them on Craigslist. That hobby, which we once operated out of our home, is now a full-on business with a large storefront in downtown Chicago. (To date, we’ve refinished thousands of pieces and have sold to nearly every state in the U.S.) We’re all about using paint, stain, hardware, and bases to breathe life back into tired furniture finds. Rather than letting these pieces’ stories end, we give them an updated one—and you can do the same.
What You’ll Need
Before you jump into your own furniture painting transformation, let’s go over some materials you’ll need to have handy. (The last thing you want is to be in the middle of a project and have to scramble to find something you forgot.) Here’s what I suggest you have on hand:
- Paint (I like chalk paint from brands like Annie Sloan, Amy Howard, General Finishes, and Jolie Paints. If you want a custom color, Amy Howard and General Finishes can be tinted.)
- Furniture Wax (all the above brands also make wax)
- Foam or horse hair paint brushes (you can go the cheaper route on these—they’ll get ruined)
- Degreaser
- Scrub pad
- Rag (old T-shirts do the trick)
- Gloves
- Plastic cups
- Hardware polisher (we use Brasso)
- Wood filler or Bondo
- Blender
- Stir stick
- Screwdriver
- Sandpaper (400 grit or higher)
- Painter’s tape
- Cheesecloth
- Sharpie
- Tarp or an old blanket to protect your floor
Tricks of the Trade
Listen guys, we’ve tried all the tricks when it comes to painting furniture. Knowing how to do it perfectly is not something that can be learned overnight. The more you do it, the more you learn and the more efficient you become. That said, there are some tricks that I can share with you to help you on your way to becoming a painting perfectionist. First and foremost? Buy a picture frame or a small side table to experiment with before attacking grandma’s beloved dresser.
Here are some other things to remember:
- For a brushstroke-less finish, add 10% water to your paint and put it in a blender on low to break up any chalk buildup.
- Number the drawers and doors so it’s easier to put them back into place (and take a photo of where each number goes).
- Blow out all dust from behind the doors and the drawers using a hair dryer to avoid getting dust in your paint.
- Sand the top of each drawer a little bit to avoid them rubbing off the paint.
- Wait for the paint to thoroughly dry before fixing any mistakes. (If you try to fix them while the paint is still wet, you’ll get pull marks.)
- Grab a bar of soap and rub it on the glides of the drawers for easy open.
Prep, then paint.

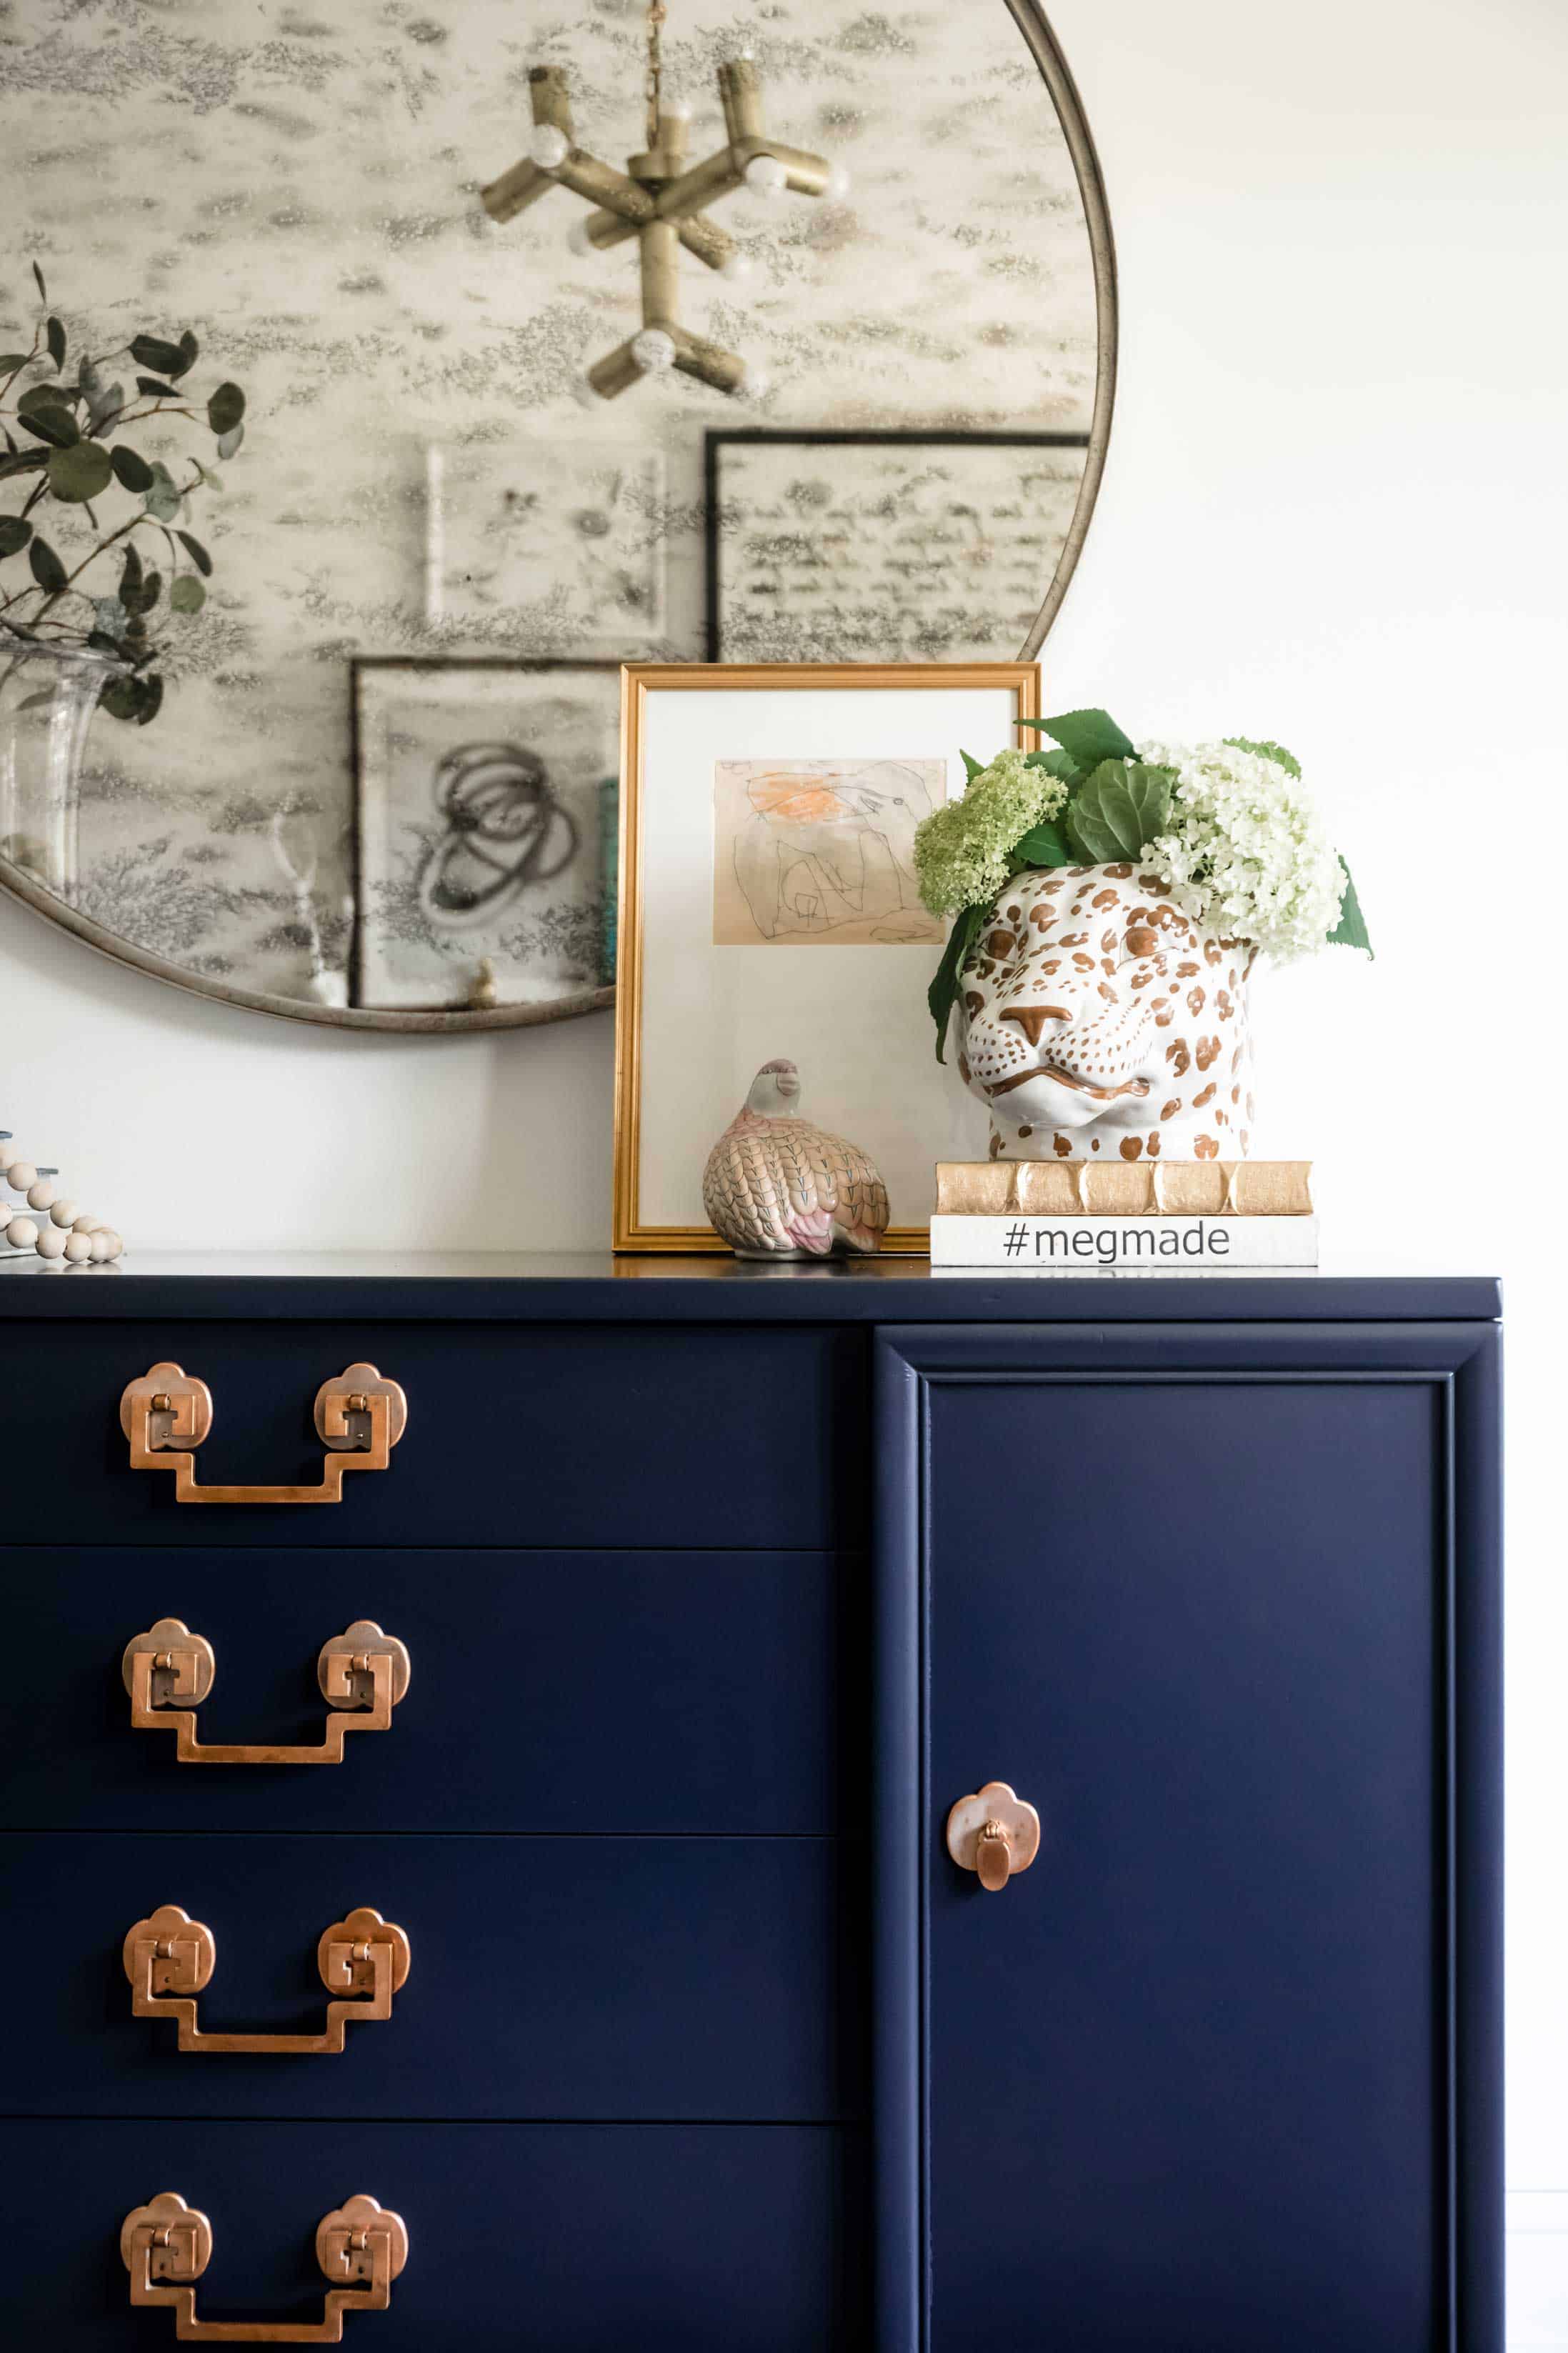
I’m going to walk you through the steps I took to refinish this piece pictured above so that you can tackle your own project at home, but before I do, let me stress one thing: patience is key! With patience, you can get through anything, so slow down, take your time, and I can guarantee your furniture transformation will come out looking like a professional job. (Plus, it’s truly a fun process once you get started!)
Here’s what to do:

Step 1: Gather all your tools and take a before picture so you can compare and appreciate all your hard work.
Step 2: Take off the old hardware and put it in a safe place.
Step 3: Remove all the drawers and doors. Get a blower or hairdryer to blow out any dust from inside of the cabinet and behind the drawers. (Remember, we don’t want dusty paint!)
Step 4: Use a degreasing spray and Brillo pad to clean the entire piece. (Some say using a waxless cleaning spray will work, but I say get the real stuff because chalk paint is so efficient it will stick to whatever it’s painted on top of, which can lead to chipping if the cleaning spray leaves a residue.)

Step 5: Fill in any dents, cracks, scratches, or missing veneer with Bondo if you’re feeling adventurous or a simple wood filler if the Bondo seems intimidating. (Bondo is waterproof and super sturdy. It’s what they use on cars that go 100 miles an hour in the rain, so it will definitely stand up to whatever you throw at it.)
Step 6: Sand the wood filler or Bondo until smooth and—a little trick of the trade—scuff the piece a bit to add some texture. I think scuffing the surface leads to a smoother appearance in the end and helps the paint to adhere better. (It can also help get rid of any remaining residue.) Wipe everything down with a rag or cheesecloth to get rid of all leftover dust.
Step 7: Now, the fun part—it’s time to paint. You can surely use regular interior latex paint, but I prefer chalk paint because it adheres to furniture beautifully without the use of primer and (usually) no sanding, which is why we love to use it. Keep in mind though that the particles that make up chalk paint can build up over time, which may keep the paint from going on smoothly. This is where the blending trick I mentioned above comes into play. I use my household blender (it typically washes right out and is made of all-green ingredients…well some brands are), but you can also buy a cheap one at a thrift store to dedicate to this purpose. Blend on low to prevent bubbles from getting in the paint.
Step 8: Put a piece of tape on the inside of the hardware holes to avoid paint dripage.

Step 9: Apply your first layer of paint and do it quickly. (If it begins to dry while you’re painting, you’ll get pull marks.) Remember: the edges of the drawers need to be painted, too. It’s often forgotten about, but it’s the first thing you’ll notice when you put your furniture back together. After you’ve painted everything once, wait for the piece to dry completely. Then, take high-grit sandpaper (400 or higher) and scuff the entire piece (but don’t rub it too hard because that will remove the paint.) Be sure to wrap up your brushes in a bag if you don’t want to rinse off between coats so the paint doesn’t get cakey and clumpy.
Step 10: Give the piece another coat and wait for it to dry. If your paint starts to get a little thick, you can add a bit more water.
Step 11: Once dry (a solid 24 hours is recommended here), use a rag to liberally rub wax over every painted surface (you can also add the wax on the tracks of drawers to make them glide more smoothly). You can use either clear wax or a tinted formula depending on the finish you desire. (We used a clear wax here.)
Step 12: After about 20 minutes—or when the piece is not tacky to the—go back with a dry rag or 0000 steel wool to buff it.
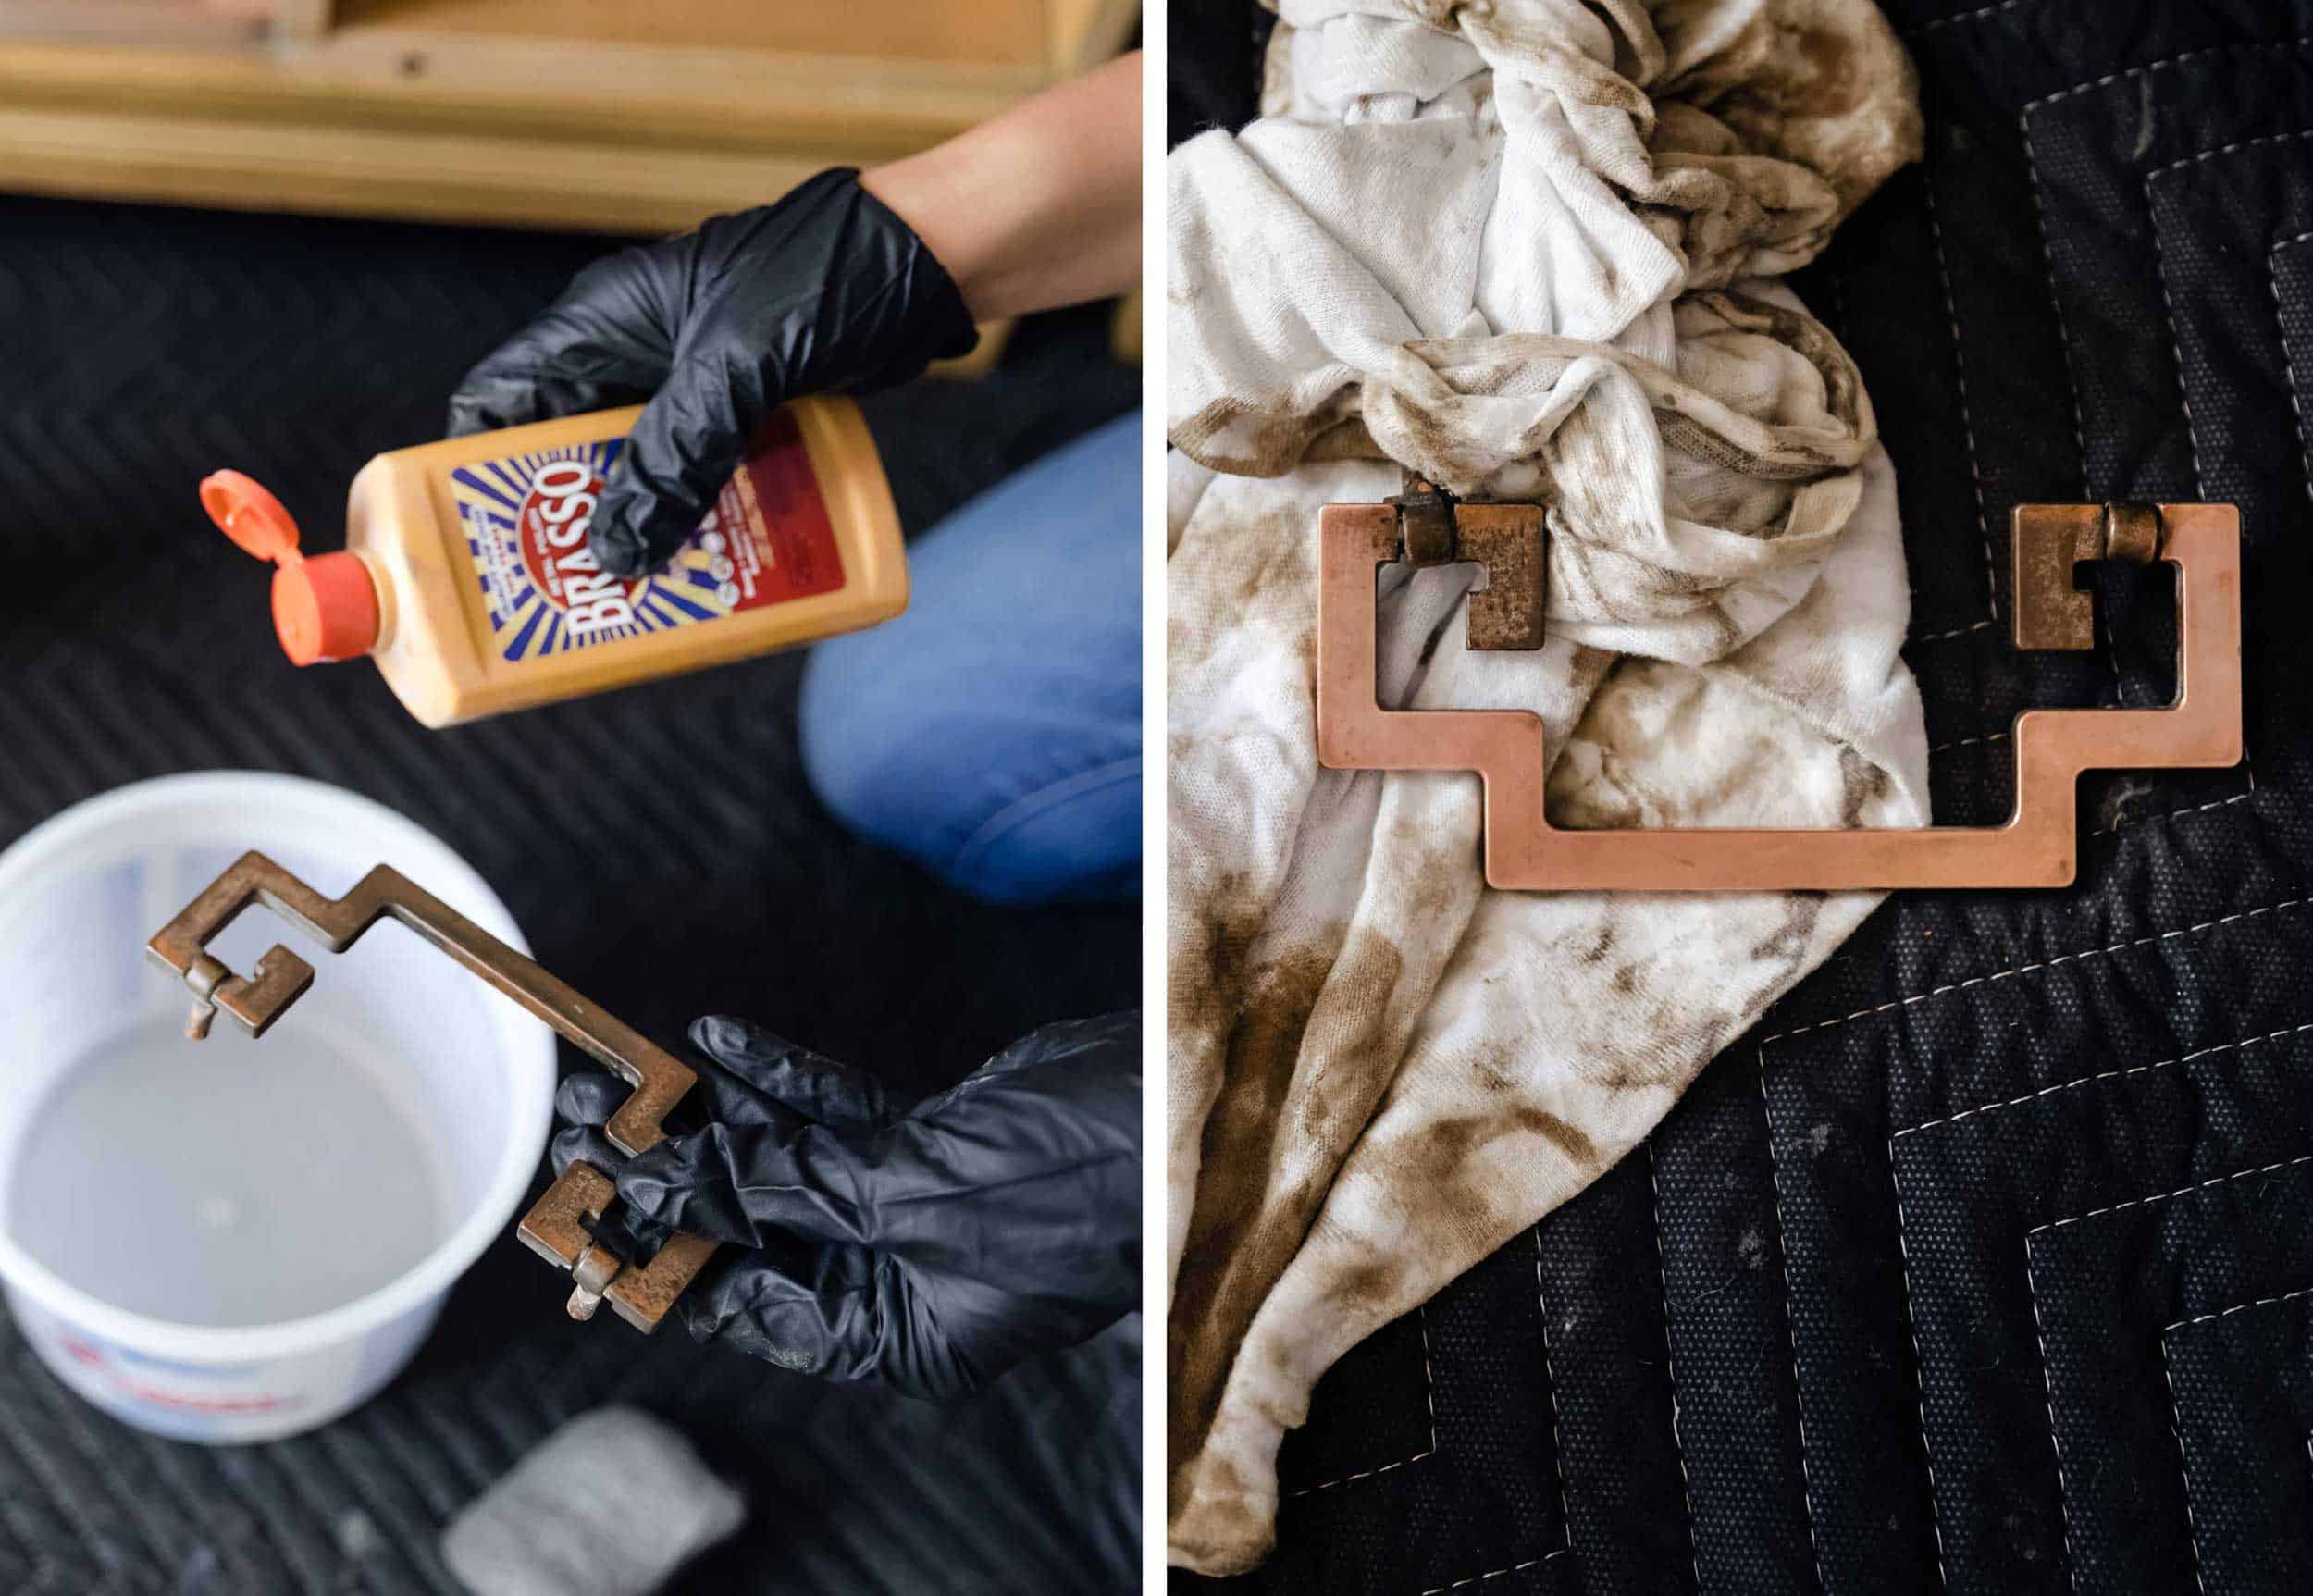
Sometimes, like in the case of the piece shown here, vintage hardware can clean up with a polisher. But if the thin metal finish has rubbed off over time, it may not be able to be cleaned to look new, which can be nice depending on the look you’re going for. If you don’t love a vintage look you can always spray the hardware with metal spray or swap out the hardware entirely.
Now it’s time to put that piece back together and take an after photo. You did it!

Thank you so much, Meg, for walking us through this beautiful transformation.
Now, we want to see your furniture transformations. Be sure to share them on Instagram using our #ShowEmYourDIY and #ShowEmYourStyled hashtags for a chance to be featured on the blog or Instagram.
***photography by Jenny Grimm


Great tips, but can we get a house tour of Meg’s space now? It looks so cool!
Man you’re good…. you did that whole sand-paint-transformation-thing next to a white couch! Not to mention mixing blue paint in a blender! Each step has potential to go so wrong for me next to white furniture. Thanks for the great tips. I guarantee I’ll be doing them in the garage!
what color/brand is the blue paint? looks amazing!
I’m about to take on painting my front door. Are there any modifications would you make for that type of project?
If your furniture piece is walnut, you’ll need to paint it with shellac first, or it will bleed right through the chalk paint. Shellac smells awful, so have good ventilation. The odor disappears once it’s dry, which thankfully happens quickly. After the shellac dries, the chalk paint can be applied per your instructions.
I’m getting ready to do a couple of walnut bookcases. Thanks for the additional tip!
I am not nearly as meticulous as Meg, but I’ve found that milk paint and wax are magical furniture transformers. I painted my husband’s awful dresser without even taking the clothes out, and it looked 100x better in about an hour. The wax is key to a rich, durable finish. Love the blender trick–milk and chalk paint do get lumpy!
Looks amazing!!
Thank you for this! I just finished some ikea hacks and used matte paint and finishing wax, and afterwards I was wondering if that was a completely wrong way to do it. Lol, so now I feel awesome. So good to hear these extra tips! I now feel confident about painting the espresso wood bar cabinetry we have in our downstairs bar!
What wax did you use? I’m about to tackle painting 3 pax wardrobes. Oh man.
This is so helpful, because I have painted furniture, with so-so results! And I plan to repaint a dresser in the near future, so this is timely. I also have wondered how to brighten up the hardware- and now I know! Thank you! That said, I’m kind of sad that grain was painted over, though it does look very nice!
Loved learning about this process! Just curious tho, regarding Step 4 (degreasing/cleaning)…why wouldn’t that come after Step 6 (sanding/removing all dust)? Thanks in advance! 🙂
Can I make a suggestion for future diys? I know that your team has really good photo shop/mock up skills. Graphic illustrations would be so useful for this kind of post.
Beautiful pieces and wonderful tips! Thank you. May I please get the paint name and color of the barn piece? The almost black color is perfect for a project I have coming up. Plus, I loved EVERYTHING about the 120 year old barn makeover! Thanks again!
Any tips for painting laminates?
I’ve painted lots of laminate furniture in my time… I didn’t bother to do anything special. I sanded very lightly, cleaned it, primed, then painted with regular latex paint. You don’t have to use a thick coat of primer–a very thin one will do.
We tried chalk paint and tinted wax on a coffee table, and it originally looked great. But after a year of use the wax has worn off, especially around the edges where people bump into it, rest their feet, etc. So if the piece of furniture gets a lot of use, you may have to re-wax it.
That is really beautiful, but I also liked the piece in its original form. Sometimes natural wood feels precious to me, but if the piece is really trashed, then paint is the way to go.
Fantastic article and great tips. Loved the finishing wax idea. Gives it that last bit of goodness and makes it richer. Thanks for sharing. Elizabeth
This is such a timely post! I have a few furniture painting projects to work on this summer.
What color is that dark blue paint? It’s really striking.
Perfect timing! I literally just bought two dressers and a chair from the tip shop yesterday! Removed all the hardware and now onto the fun stuff. This guide is great!
Thanks!
What about if you want to go glossy?
I have a knotty pine dresser from the 80’s. Will this technique work or will the knots bleed through?
What IS furniture wax? Why is that used here instead of a more traditional clear coat, and how does the wax hold up?
I have been considering painting our ancient dining room table, since it is the right size and shape and functionally everything we want. It’s just sort of hideous.
This how-to seems very doable and way less work than what I’d pictured, but would it hold up to heavy use and daily wipe downs?
Wow, looks amazing!
Mariya | https://www.brunetteondemand.com/
Does anyone have experience doing this to chairs? I have some old wooden dining room chairs I’ve been wanting to paint black.
I recently painted a piece of furniture with enamel paint and was very pleased with the results. Thoughts on enamel? I thought it would be quite a sturdy job with enamel…